
2D & 3D Visualization of Shades and Seats
Project Overview
We wanted to design seating and shading structures that weren’t just functional, but actually made sense for real people. The challenge was figuring out how to balance aesthetic appeal with usability while making sure everything worked well in its environment.
The Process:
Brainstorming & Ideation – We explored different concepts, balancing form and function.
User Research & Feedback – Talking to users helped refine ideas and focus on what truly mattered.
Sketching & Concept Development – We translated rough ideas into structured sketches to bring them to life.
Digital Prototyping – Using 2D/3D tools, we tested spatial relationships, light, and usability.
Fabrication & Assembly – Laser-cutting and hands-on assembly brought our final design together.
Brainstorming & Research
Early on, we realized that to make something meaningful, we needed to refine our focus and ask the right questions:
What do people actually need in these spaces?
How can we make this intuitive and easy to use?
What makes our design stand out?
To get reliable answers, we turned to user research and testing. Talking to potential users gave us insights that completely changed how we thought about the design, helping us strip away unnecessary ideas and refine what really mattered.
Designing & Prototyping
Once we had a clearer direction, we jumped into digital modeling using Rhinoceros 3D and Adobe tools. This stage was all about figuring out the spatial relationships, including how people would sit, interact with the shading structures, and how light and shadows would move throughout the day.
We kept testing and refining, adjusting the details to make sure:
The seating felt natural and inviting
The shading structures actually worked (not just looked good)
The materials made sense for both durability and aesthetics
Design Iterations


Chosen Combinations of Seating and Shading


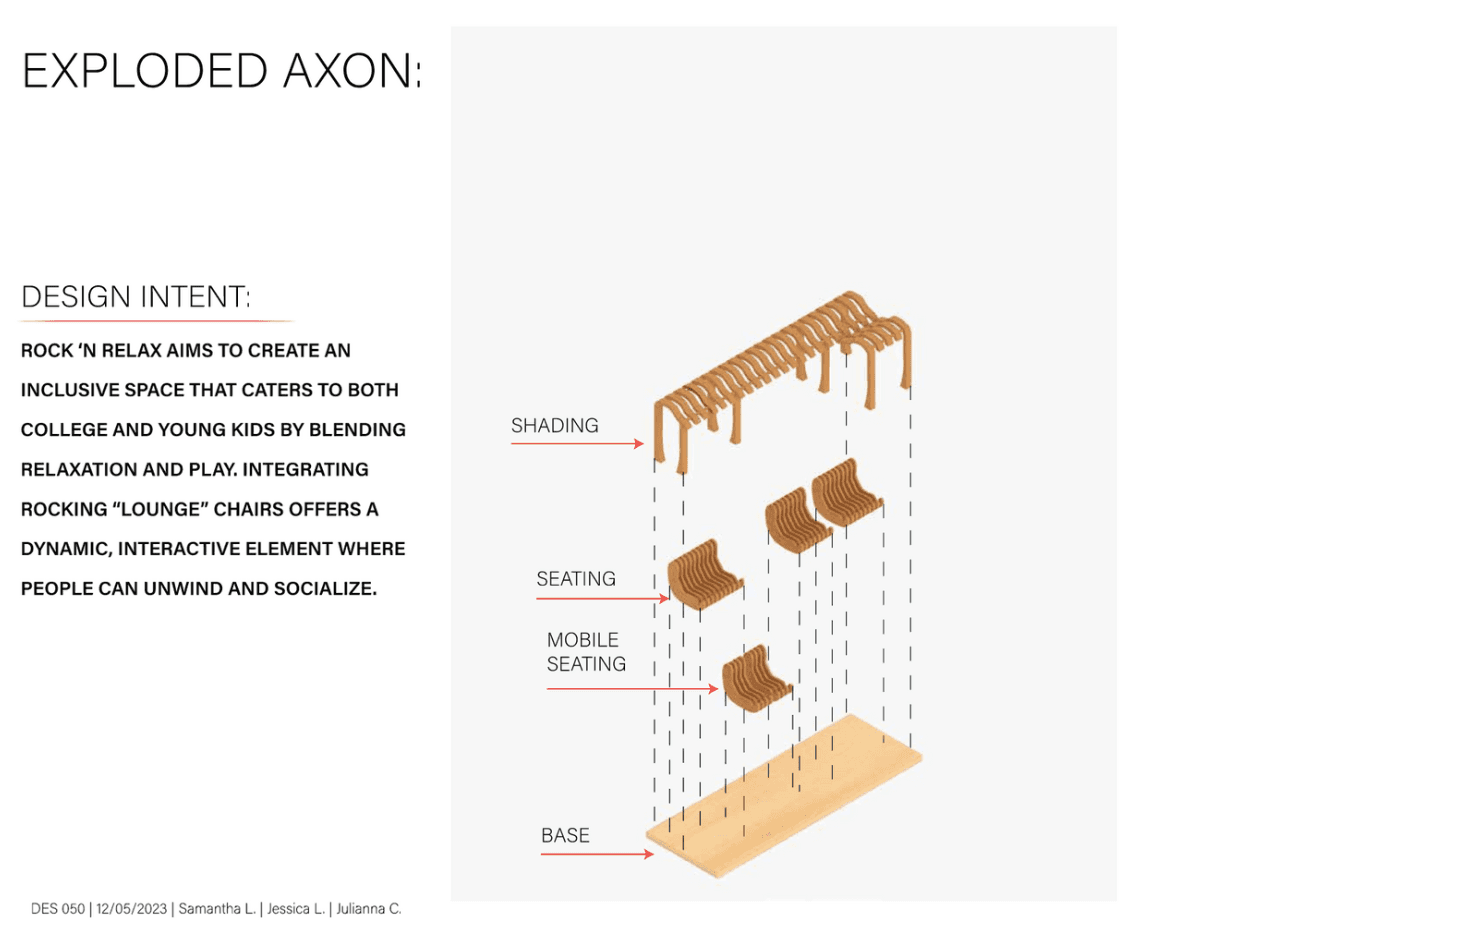
Exploded Axon of Final Design
Floor Plan of Final Design

💡 Creating a miniature version of our prototype enabled us to examine aesthetics, functionality, and durability under different conditions.
Bringing It to Life
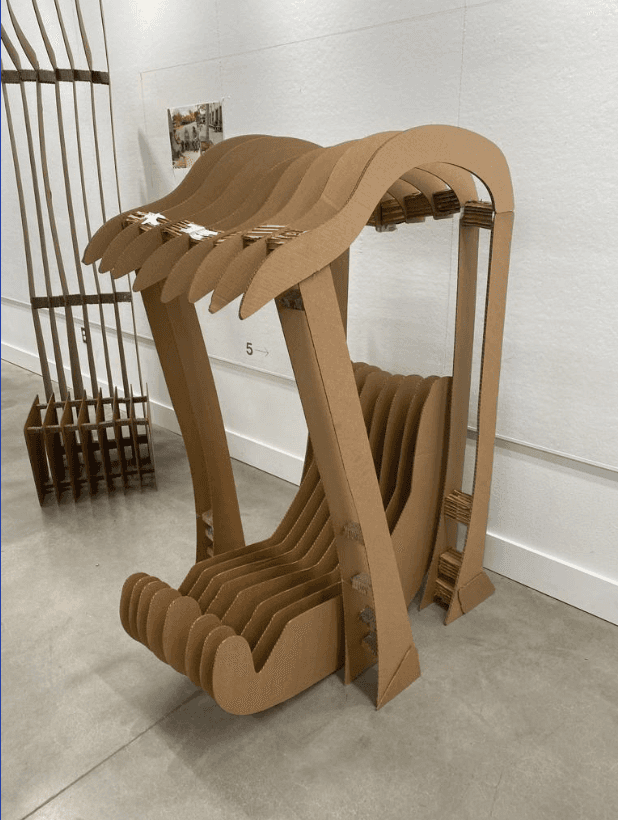
After refining our digital models, we moved on to laser cutting and assembly. Choosing the right materials was key, we needed something sturdy but not bulky, visually clean but still durable. The fabrication process let us see how everything came together in real life, leading to final adjustments before completion.
Perspective Render of Final Design

💡 Given our designs relaxed and welcoming features, we decided it would be most appropriate for our shaders and seats to be placed outside a coffee place in downtown Davis.
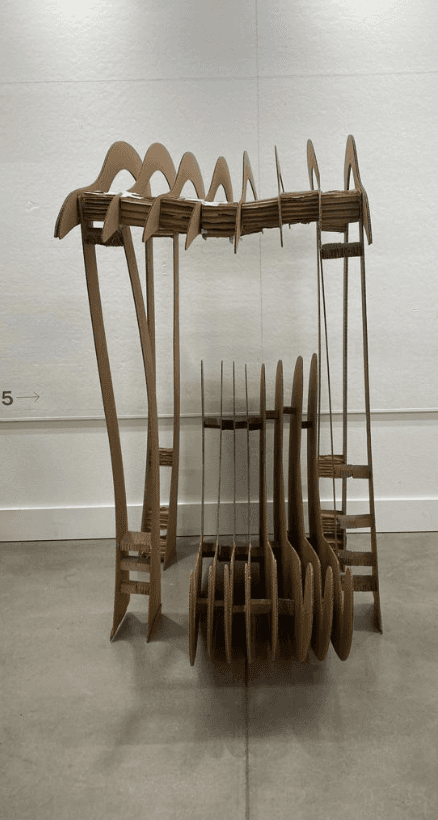
To-scale Prototype of Final Design

Final Reflection
This project reinforced that good design isn’t just about aesthetics, it’s about usability. Every decision we made was shaped by how people interact with a space and what they actually need. Through constant testing and iteration, we refined our vision into something that’s not just visually appealing but practical and functional.
More than anything, this experience highlighted the importance of starting with big ideas, asking the right questions, and refining until every detail makes sense. It’s a process of continuous learning, and that’s what makes design so impactful.

Julianna Chan 2025 Portfolio